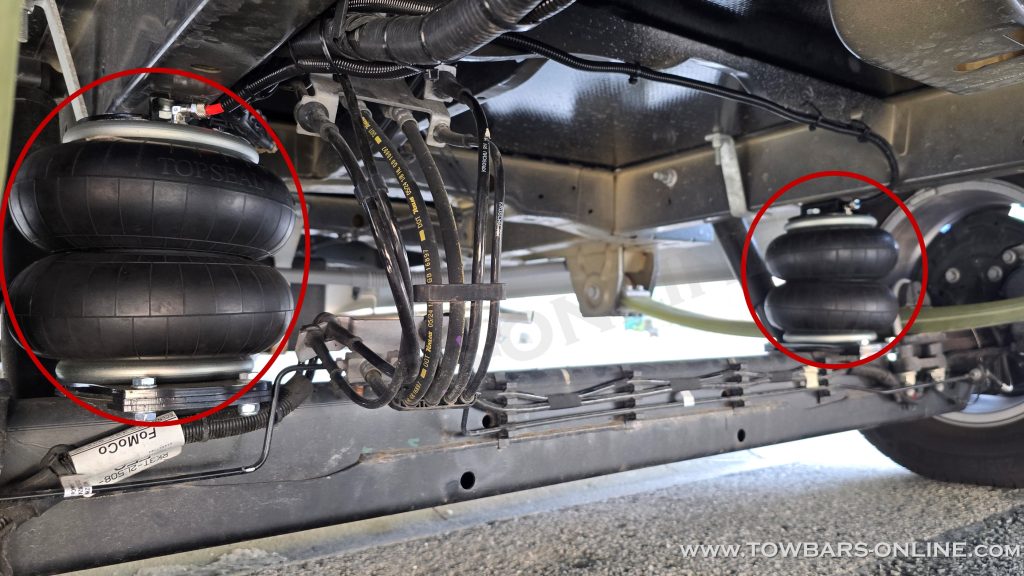
The Ford Transit Mark V is a fourth-generation vehicle, identified internally by the model or type designation V363. It therefore represents a specific series within the Ford Transit range.
The Ford Transit is one of Europe’s best-selling commercial vehicles and is available in numerous versions, from the classic panel van to minibuses and kombi models, as well as the chassis cab. The model is also becoming increasingly important in the motorhome market.
Under high permanent loads, the standard leaf spring suspension quickly reaches its limits. Tradespeople who regularly carry heavy loads, as well as Transit owners using the vehicle as a motorhome, will recognise the problem: a sagging rear end, reduced ride comfort and less stable handling.
A modern supplementary air suspension system provides an effective solution.
Practical test: an introduction to the TOP-Seal air suspension system
The TOWBARS-ONLINE editorial team had the opportunity to follow the installation of the AirSprings air suspension system in several workshops. This allowed us to observe and assess both the fitting process and the system’s day-to-day use.
The aim was to assess how practical the system is to use, how demanding the installation is and what added value the air suspension provides in everyday operation.
About the manufacturer LEMET
LEMET is a Polish manufacturer of spare parts and accessories for motorhomes and agricultural vehicles, with a history dating back to 1992. Originally specialising in replacement parts for agricultural vehicles, the manufacturer has continuously expanded its activities.
Today, the range includes tow bars, chassis extensions and air suspension systems marketed under the TOP-Seal brand.
In France, the products are distributed B2C by X-CAMPING. B2B distribution for workshops, fleet operators and professional customers is handled directly by LEMET.
TOP-Seal air suspension at a glance
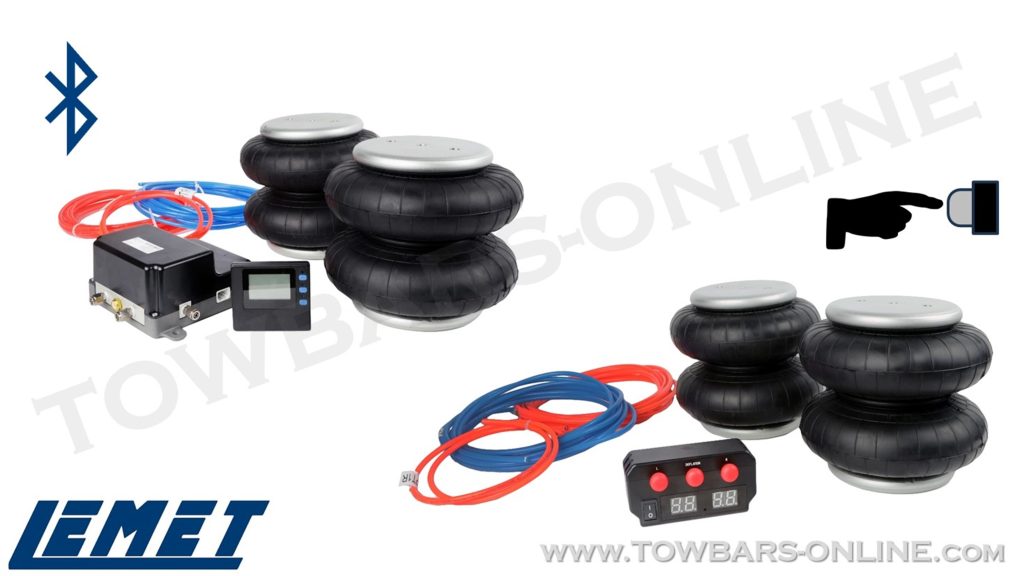
The TOP-Seal air suspension system is available in two versions:
AirSprings Premium – with Bluetooth control
The AirSprings Premium system is a modern aftermarket supplementary air suspension solution for Ford Transit models produced from 2014 to 2019, as well as facelift models from 2019 onwards.
The dual-circuit system with Bluetooth control allows the pressure in the two air springs to be adjusted independently using a portable LCD display or a smartphone app. Robust 8-inch air springs and a high-performance compressor ensure durability and reliable operation.
Thanks to the vehicle-specific brackets, TÜV certification and CE approval, no additional amendment to the vehicle registration documents is required.
AirSprings Standard
The AirSprings Standard version also uses a dual-circuit system and is aimed at users who do not require the additional digital functions.
The system provides precise pressure adjustment via a digital valve block, together with robust air springs and a vehicle-specific fitting kit. Here too, the approval means no additional registration entry is required.
Both versions are available for front-wheel-drive (FWD) and rear-wheel-drive (RWD) models.
Focus on installation
Installation of the Premium and Standard versions is identical at the rear axle. The following section therefore focuses on the common fitting procedure.
With good technical knowledge, installation can be carried out by an experienced user. For optimum safety and to protect the warranty, however, fitting by a specialist workshop is recommended.
TOP-Seal air suspension installation procedure
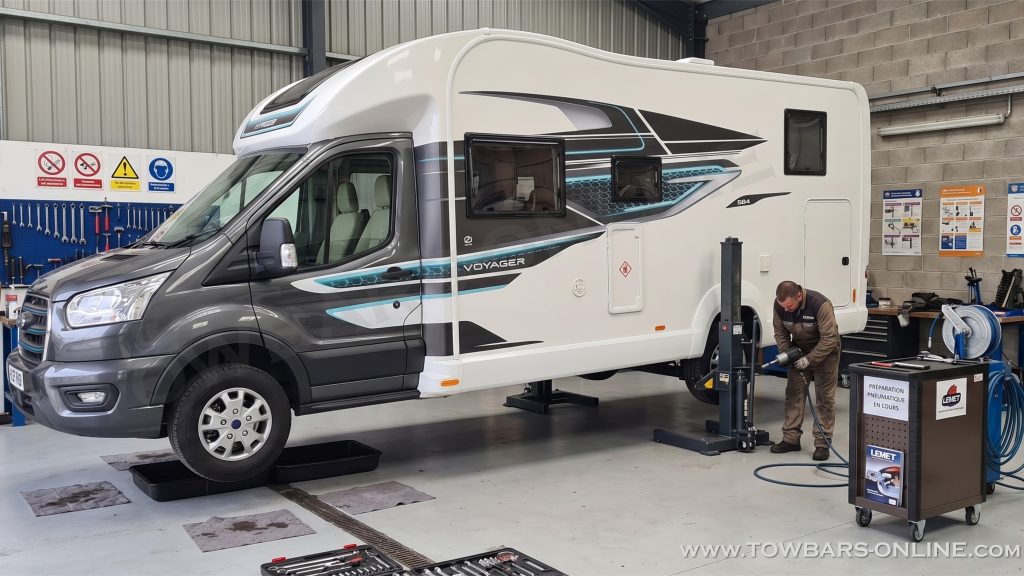
- Vehicle preparation
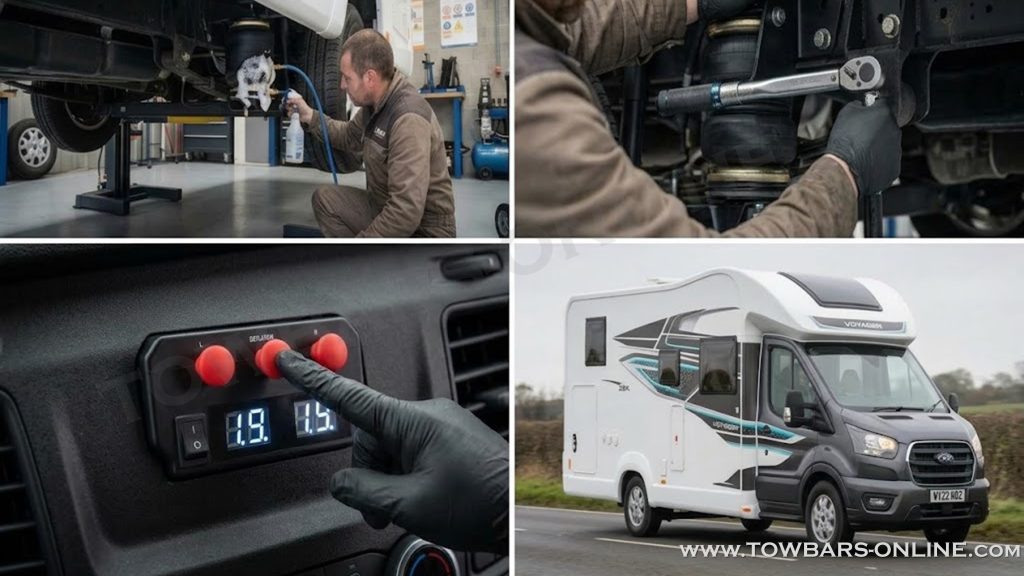
Raise the vehicle safely on a vehicle lift or support it on axle stands. The rear axle must be fully unloaded. Any air pressure already present in the system must be reduced to 0 bar.
- Removal of the original bump stop
Remove the original rubber bump stop located between the axle and the chassis. In the standard configuration, it limits suspension travel and is replaced by the air spring.
- Fitting the upper bracket to the chassis
Fit the upper bracket to the designated mounting points on the chassis.
- Secure using M10 bolts and washers
- Tightening torque: approx. 50 Nm
- Fit flat and free from tension
The bracket will subsequently act as the mounting surface for the air spring.
- Preparing the air spring
Pre-assemble the air spring before installation:
- Fit the lower base plate
- Screw in the angled air fitting
- Secure using M10x20 countersunk bolts
The air fitting should be installed at this stage, as it will be difficult to access later.
- Fitting the air spring to the upper bracket
Insert the pre-assembled air spring from below and bolt it into position.
- Secure using M10x16 bolts
- Tightening torque: approx. 30 Nm
- Ensure precise vertical alignment
Correct positioning helps prevent subsequent air leaks and excessive stress on the components.
- Fitting the lower bracket to the axle
The installation method differs depending on the drivetrain:
Front-wheel drive (FWD): Secure to the axle using clamping brackets
Rear-wheel drive (RWD): Fit using dedicated mounting brackets
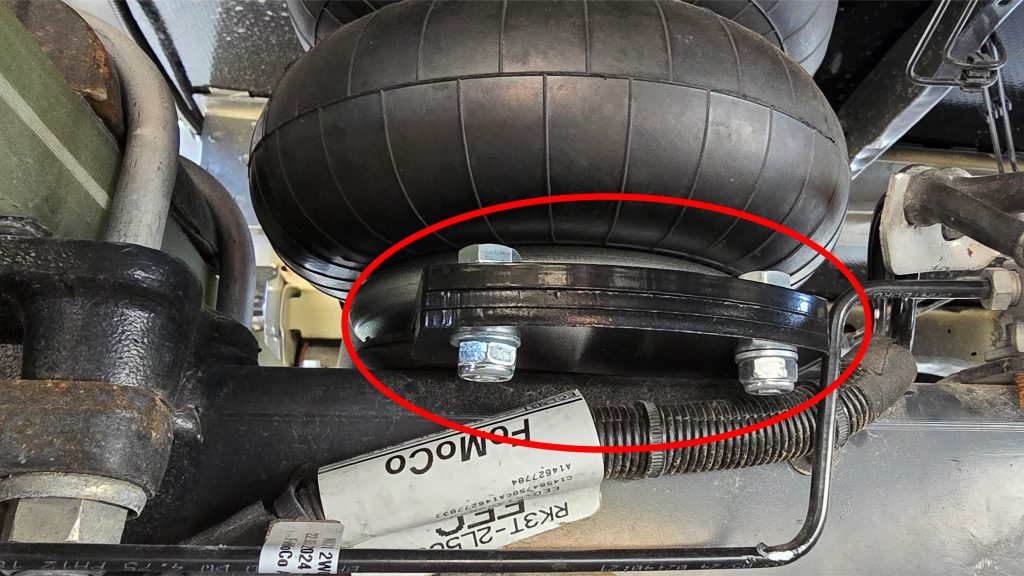
In both cases:
- Tighten all bolts evenly
- Tightening torque: approx. 30 Nm
- Check vertical alignment using a spirit level
- Routing the air lines
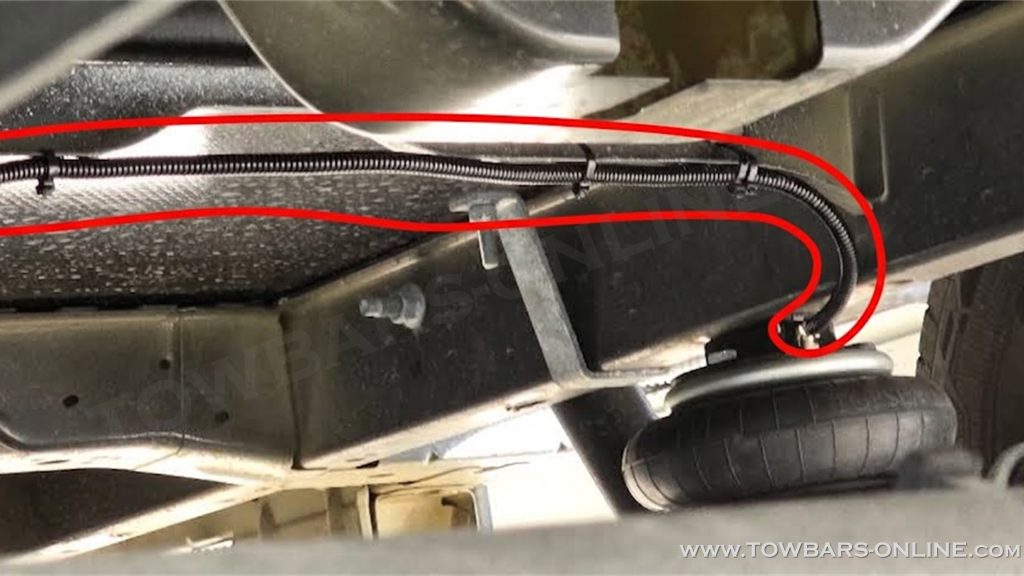
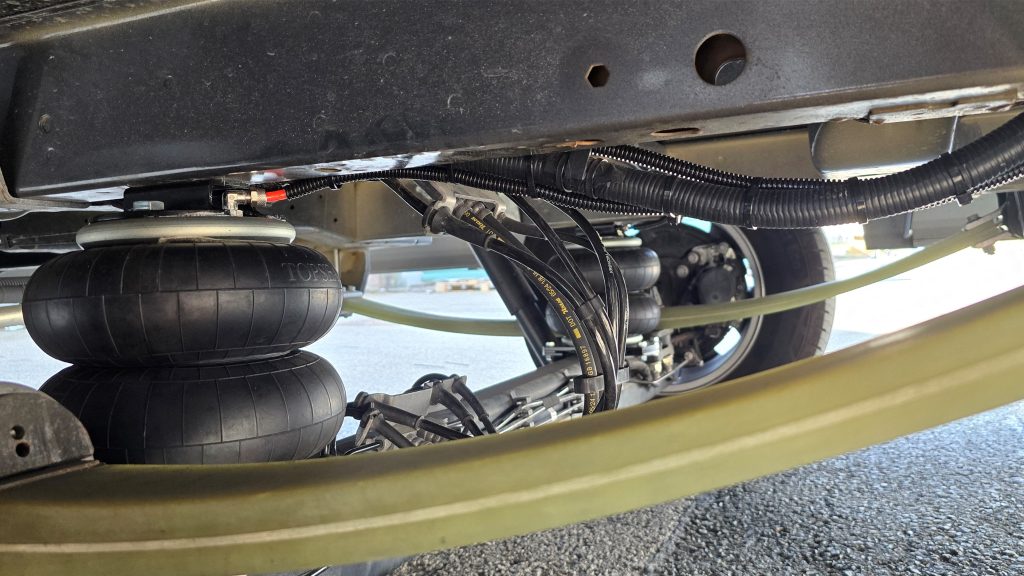
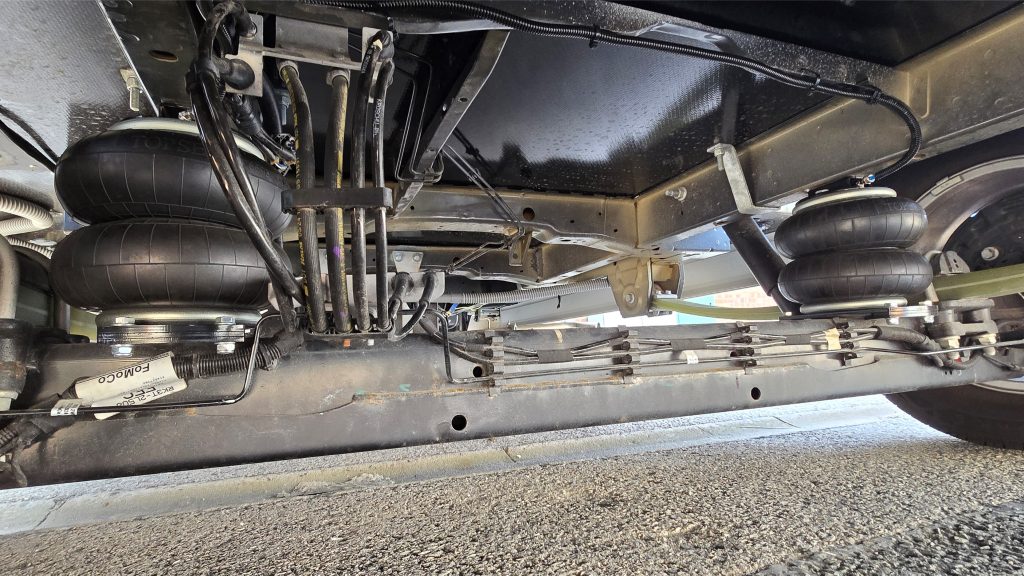
Route the compressed-air lines along the chassis and secure them with cable ties.
Important points:
- No contact with hot or moving parts
- No kinks or pinching
- No tension on the air line
- Allow approximately 20 cm of spare air line at the air spring
- Connecting the control system and compressor
Connect the air lines to the control unit and compressor. Installation of the control panel depends on the selected version (Standard or Premium) and must be carried out in accordance with the manufacturer’s instructions.
To support the installation, the manufacturer also provides detailed video tutorials on YouTube, explaining the electrical and pneumatic connections step by step:
These tutorials are particularly helpful for less experienced installers and help to avoid the most common fitting errors.
The system is then pressurised for the first time and checked for correct operation.
- Function check and adjustment
Finally, carry out the following checks:
- Check for leaks using leak-detection spray
- Check all bolted connections
- Initial pressure setting (1–2 bar unladen)
- Road test
The recommended operating pressure is between 1 and 4 bar, depending on the load. The maximum pressure of 7 bar must not be exceeded.
The air suspension should only be installed by experienced persons or a qualified specialist workshop. Incorrect installation can damage the running gear, cause malfunctions or invalidate the vehicle’s approval for road use.
Key facts about the TOP-Seal air suspension
- Installation time: 3–4 hours
- System: dual-circuit air suspension
- Pressure range: 1–7 bar
- Registration: not required (CE)
- Compatibility: front-wheel drive (FWD) and rear-wheel drive (RWD)
Conclusion
Installation of the TOP-Seal air suspension on the Ford Transit Mark V is well structured, practically documented and can be completed within a few hours using the correct tools.
The precise fit, material quality and noticeable improvement in ride comfort and stability are particularly convincing. For tradespeople, motorhome conversions and vehicles operating under a high permanent load, the air suspension system represents a practical and durable investment.
When installed correctly, the system provides a significant upgrade to the vehicle in everyday use.